
Vertex Painter v.1 Guide
*Shader documentation coming soon!!!
Paint Vertex Colors
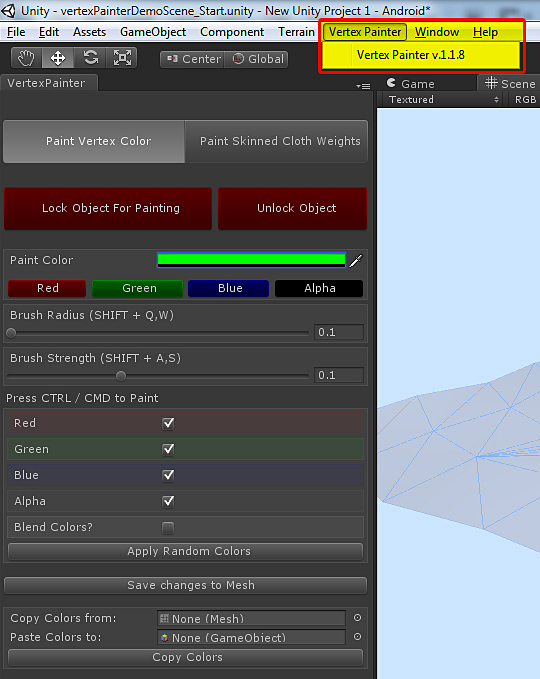
Open up the vertex painter at the top of the menu bar

Select an object you would like to paint.
Note: The object must have a renderer attached, so ensure that it
does and you are not selecting the parent object.
Press the "Lock Object for Painting" button.
Note: The object must have a renderer attached, so ensure that it
does and you are not selecting the parent object.
Press the "Lock Object for Painting" button.
(This will lock the object as being flagged for vertex painting
and will not allow any other objects in the scene to be painted.)
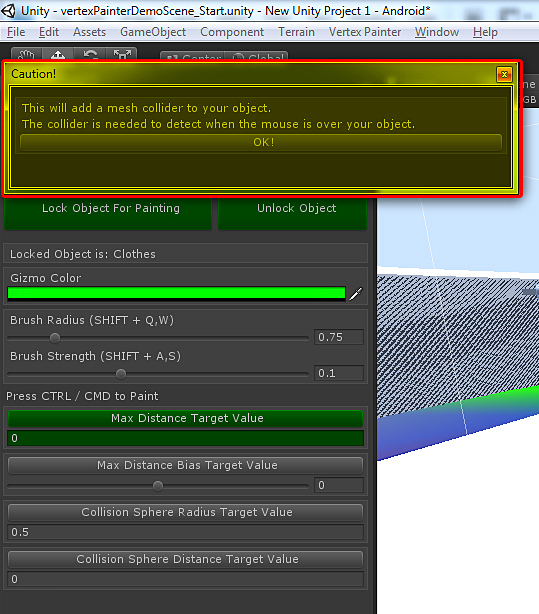
You may get a popup informing you that a mesh collider will be attached to the object.
This is to detect where the mouse is over the object, and to determine what vertices are in range of the mouse.
If you do not need the mesh collider, remember to remove the collider before the scene is published, as it is only need to paint vertex weights.
This is to detect where the mouse is over the object, and to determine what vertices are in range of the mouse.
If you do not need the mesh collider, remember to remove the collider before the scene is published, as it is only need to paint vertex weights.
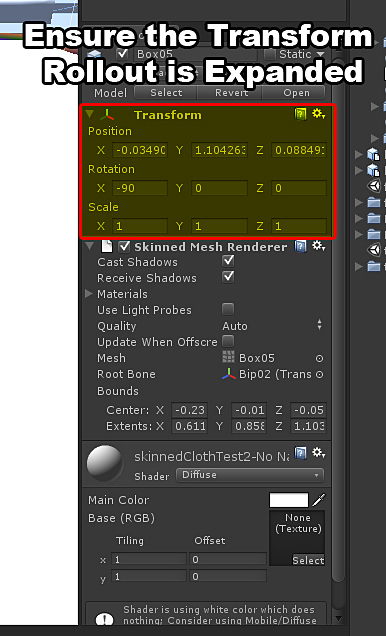
Ensure that the transform inspector foldout is expanded.
Note: If the transform inspector foldout is not expanded, the gizmo will be hidden and painting will not be allowed.
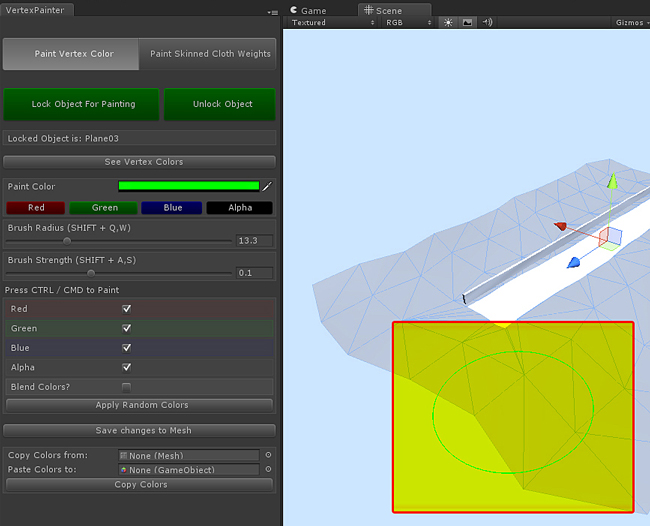
Place your mouse over the locked object to be painted and you should see a ring indicating the area that
will be painted.
If you do not see a ring, adjust the brush radius to ensure the ring is large enough to see.
If the radius is too small, the ring will not be visible unless you are zoomed into the area.
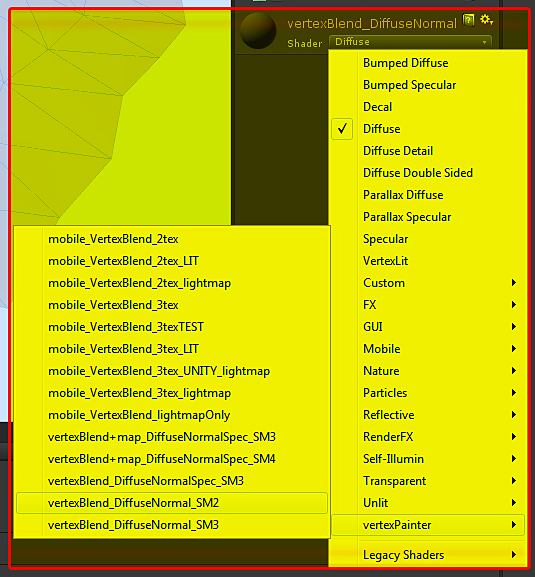
Apply one of the vertexpainter shaders to the locked object.
If the radius is too small, the ring will not be visible unless you are zoomed into the area.
Apply one of the vertexpainter shaders to the locked object.
Set the textures for each slot in the shader, and note the color needed to represent the texture.
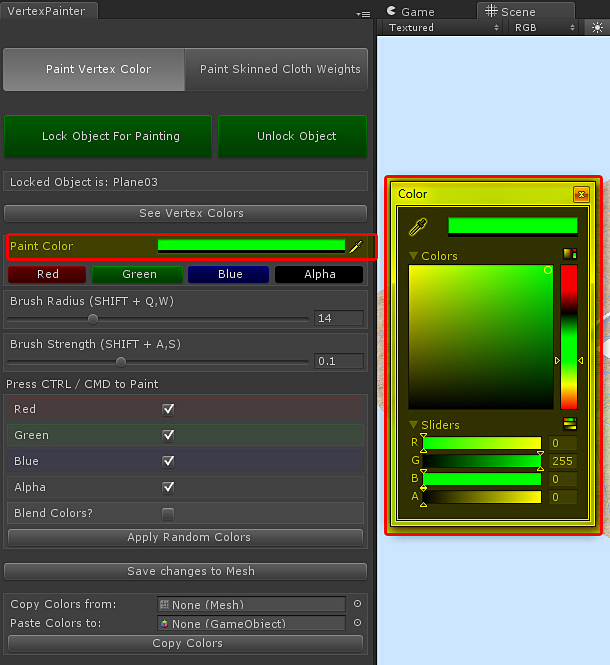
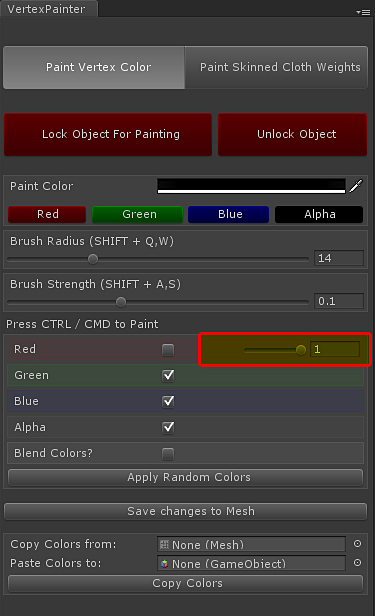
Select the Paint Color picker to select the color you want to paint (If you are using the desktop shaders, the order is always:
Red for first texture
Green for second
Blue for third
Set the color manually to paint an individual color.
Select the Paint Color picker to select the color you want to paint (If you are using the desktop shaders, the order is always:
Red for first texture
Green for second
Blue for third
Set the color manually to paint an individual color.
Once the color is selected, you can start painting.
Press CTRL / CMD to paint the color, when your cursor is over the object.
Adjust the brush radius and brush strength to suit your needs.
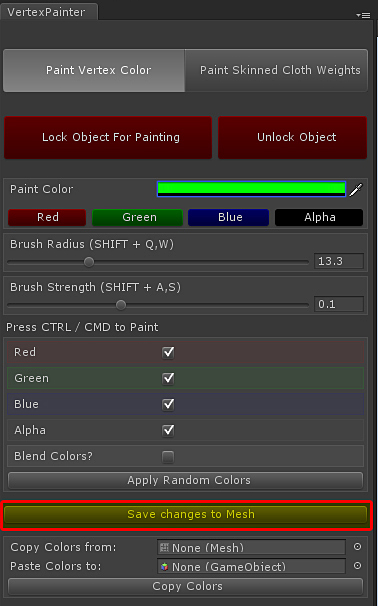
When painting is complete and you are satisfied with the result, Press the "Save changes to Mesh" button. (This will create a separate mesh that has the vertex color data).
Press CTRL / CMD to paint the color, when your cursor is over the object.
Adjust the brush radius and brush strength to suit your needs.
When painting is complete and you are satisfied with the result, Press the "Save changes to Mesh" button. (This will create a separate mesh that has the vertex color data).
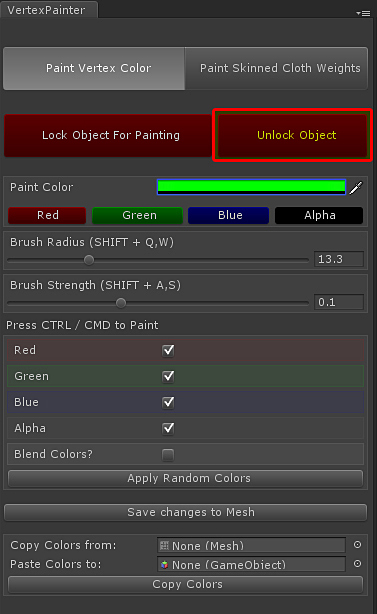
It is recommended to unlock the object after you are done, so the script does not continuously monitor
the object for changes.
Random Colors Option

Follow the above steps for setting up and object (lock, expand transform rollout, set shader)
The random color option is intended for desktop shaders that use all three color channels and alpha.
The random colors option applies a random color to each vertex, which you could use on a large terrain you don't want to paint by hand.
The checkbox next to the colors represent whether you want the vertex to possibly have that color depending on the random outcome.
If you want to exclude the color, uncheck the box.
If you uncheck the box, a slider appears which allows you to hardset the value of all the pixels.
(Say you want all the pixels to have red in the color, set the value to 1, or if you want all the pixels to have no red in the color, set the value to 0.
(Say you want all the pixels to have red in the color, set the value to 1, or if you want all the pixels to have no red in the color, set the value to 0.
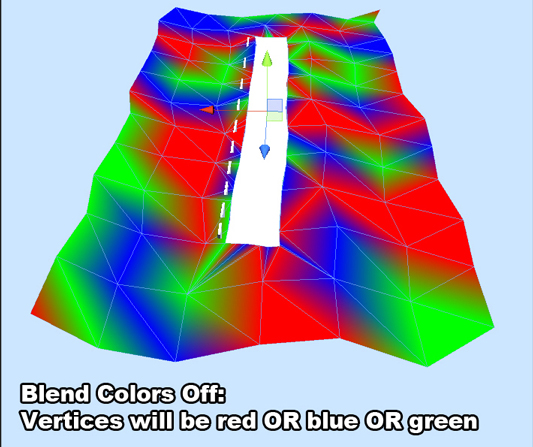
"Blend Colors" option will still randomize colors, but the values will be in a range from 0 - 1, rather than 0 OR
Depending on what shader you use will determine what mode you will need.

If you want a vertex to be only red, only blue or only green, then do not use "blend colors".
If you want the vertex to be a blend of all the values, then use "blend colors"
If you want the vertex to be a blend of all the values, then use "blend colors"

Copy Colors Option

This functionality allows you to copy the vertex color information from one mesh to another.
A possible use for this is if you import a new model that does not match the original and you want to use the already painted data for the new mesh (A terrain with a new hill or feature that increased the vertex count).
Use the object finder to assign meshes to both slots of the Object selector at the bottom of the tool window.
Once both slots are populate, press the "Copy Colors" button to transfer the color data to the new mesh.
This will copy the vertex color data to the new mesh, but there may be errors, since they are being copied in order.
If there are new vertices in the new mesh, then they will need to be repainted.
This will copy the vertex color data to the new mesh, but there may be errors, since they are being copied in order.
If there are new vertices in the new mesh, then they will need to be repainted.
Skinned Cloth Painter
*NOTE: Due to a bug introduced with Unity 3.5, the skinned cloth painter is not working as intended. I am still
waiting on an official response from Unity to fix the bug resulting in skewed transforms and lost vertex
information.
Version 3.4 did not have a problem so if you need to paint, I recommend using 3.4 if that is an option.
As soon as Unity fixes the bug, I can ensure it works like it should.
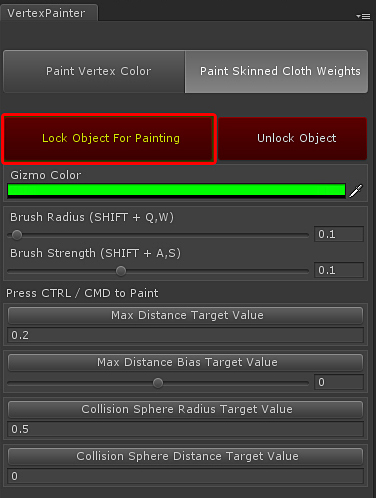
Select an object with a "skinned mesh renderer" and "Lock Object" This will prevent other objects from
being affected.
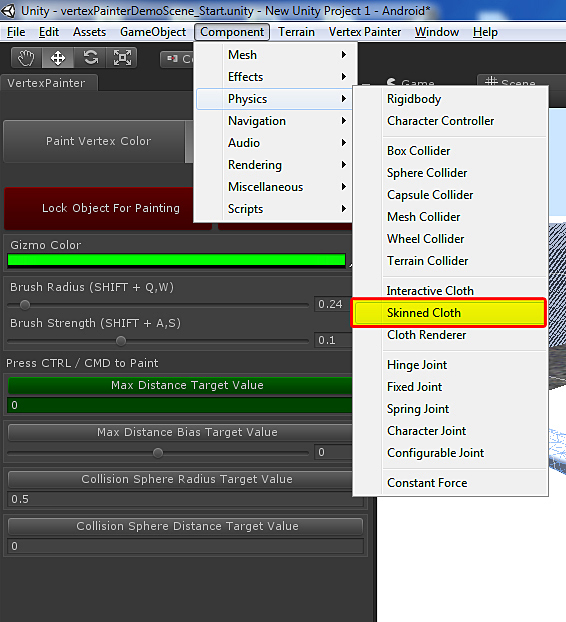
Add a "Component > Physics > Skinned Cloth" to the selected object.
Add a "Component > Physics > Skinned Cloth" to the selected object.
Look at the skinned cloth inspector and ensure skin vertices are visible
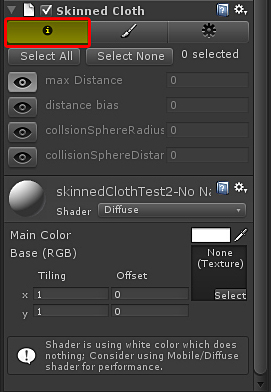
Ensure the transform rollout is expanded so the brush gizmo is visible in the editor
You may get a popup informing you that a mesh collider will be attached to the object.
This is to detect where the mouse is over the object, and to determine what vertices are in range of the mouse. If you do not need the mesh collider, remember to remove the collider before the scene is published, as it is only need to paint vertex weights.
This is to detect where the mouse is over the object, and to determine what vertices are in range of the mouse. If you do not need the mesh collider, remember to remove the collider before the scene is published, as it is only need to paint vertex weights.
Press CTRL / CMD to paint weights. Adjust the skinned cloth values to suit your needs.
